You have a brilliant idea. It might be a logo for a new small business, a custom gift for a friend, or a personal design you’ve been dreaming of wearing. You can see it perfectly in your mind’s eye, but getting that vision from your head onto a cap or a jacket involves a fascinating translation process. This journey from a simple concept to the satisfying hum of an embroidery machine is powered by a crucial, behind-the-scenes art form: the creation of digitized embroidery designs.
This process is what turns any image into a language that an embroidery machine can understand. It’s the magic that turns pixels into stitches and ideas into thread. But what does this journey actually look like? Let’s pull back the curtain and follow the path a design takes, from its initial spark to a finished, machine-ready file.
The Spark: Where Every Design Begins
It all starts with an idea. This concept can come from anywhere—a sketch on a napkin, a company logo in a vector file, or even a photograph. The key at this stage is having a clear visual. The stronger and cleaner the original artwork, the smoother the rest of the process will be.
For designers, this often means working with a high-resolution image or, ideally, a vector graphic. Vector files, like those created in Adobe Illustrator, are the gold standard because they use mathematical paths to define shapes. This allows for clean, scalable lines that don’t get pixelated. A simple, bold design with clear boundaries will always digitize more successfully than a complex, shaded photograph. Think about what you want the final product to be. A detailed portrait of a pet will require a different approach than a bold, text-based logo.
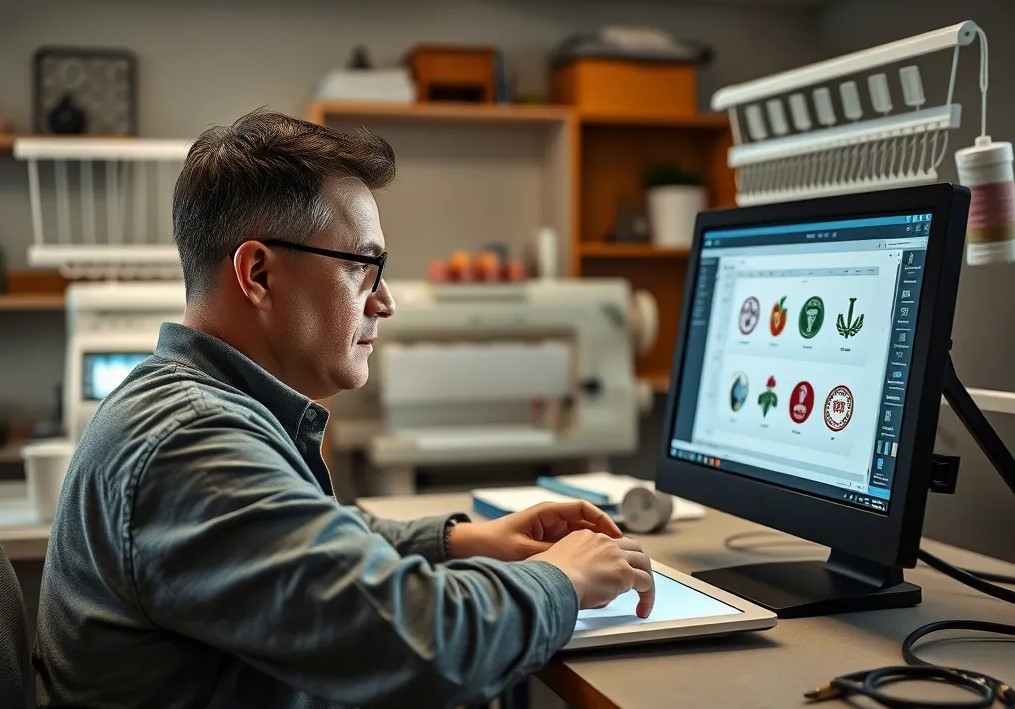
The Blueprint: The Art and Science of Digitizing
This is the heart of the entire operation. Digitizing is not a simple, automated file conversion. You cannot just drag an image into software and get a perfect embroidery file. Instead, a skilled human digitizer acts as both an artist and an engineer, creating a detailed set of instructions for the embroidery machine.
Using specialized software, the digitizer meticulously maps out the design. They don't just trace lines; they define the type of every stitch. Will an area use a satin stitch for a smooth, shiny finish, or a fill stitch to cover a larger space? They determine the stitch direction, which can create visual effects like depth and texture. They also set the stitch density, which is critical—too dense, and the fabric might pucker; too loose, and the fabric will show through.
Perhaps most importantly, the digitizer plans the stitching sequence and the underlay. The underlay is a foundation of stitches laid down first to stabilize the fabric and create a base for the top stitches. Getting this right is what separates an amateurish result from a professional, durable piece. This entire stage is a thoughtful, technical process that directly determines the quality of the final embroidered product.
Speaking the Machine's Language: Understanding File Formats
Once the digitizing is complete, the software saves the design in a specific file format. This is a crucial step because not all embroidery machines speak the same language. Your home Brother machine likely reads .PES files, while a commercial Tajima machine might use .DST. Other common formats include .HUS for Husqvarna/Viking machines and .JEF for Janome.
A good digitizing service will provide the correct file format for your specific machine. This machine-ready file is a complex set of commands that tells the needle exactly where to go, when to jump, when to change thread color, and when to trim. It’s the final, translated blueprint, packed with all the intelligence created during the digitizing stage.
The Proof is in the Stitching: The Importance of a Test Run
Even the most experienced digitizer knows that a design on a screen can behave differently on actual fabric. That’s why a test stitch-out is an essential step, especially for complex designs or when using a new type of material.
Sewing the design on a scrap piece of the same fabric intended for the final product reveals everything. It can show if there are any registration issues where layers don’t align perfectly. It can highlight if the density is wrong, causing the fabric to pull or the stitches to look gappy. It also confirms that the thread colors work well together and that the overall size and placement are correct. This test run acts as a quality control check, allowing the digitizer to go back into the software and make fine-tuning adjustments before the final production run. This step saves time, thread, and frustration in the long run.
From File to Fabric: The Final Embroidery
With a perfected digital file in hand, the final stage is the embroidery itself. The file is loaded into the embroidery machine via a USB stick or a direct computer connection. The operator hoops the fabric securely, loads the correct thread colors, and initiates the process.
Then, the magic happens. The machine takes over, following the digitized instructions with precision. The needle moves up and down, the hoop shifts direction, and thread by thread, the design comes to life. Watching a machine execute a well-digitized file is a satisfying conclusion to the journey. The result is a clean, professional, and durable piece of embroidery that perfectly captures the original concept.
Conclusion: More Than Just a Conversion
The path from a simple concept to a machine-ready file is a testament to the blend of creativity and technical skill found in digitized embroidery designs. It’s a multi-stage process that involves careful planning, artistic interpretation, and engineering precision. Understanding this journey helps you appreciate the craftsmanship behind every embroidered piece you see and empowers you to create your own with higher expectations. Whether you are a business owner branding apparel or a hobbyist making a personal gift, knowing what goes into a quality digitized file ensures your final stitched product is nothing short of spectacular.